Saturday 20 January 2018

HOW TO MAKE DIY GLITTER SANDALS

DIY GLITTER SANDALS

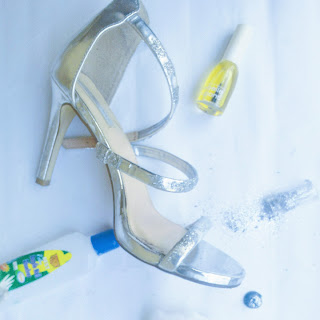
 I happened to just come up with this DIY glitter sandals some months back. I bought this sandal for my traditional marriage and ended up not finding it as attractive as I did when I saw it in the market.  I decided to revamp it into something a bit sparkly.

It's super easy to make and takes about 1 to 2 hours depending on the surface you are working with. Mine took me 1 week*covers face*. I was really busy during that period and confused as well so, I sort of learnt on the job. 


MATERIALS YOU'LL NEED

DIY GLITTER SANDALS
  • A pair of sandals 
  • Clear Nail polish aka Nail hardner
  • Cardboard sheet or a plastic bag (just to protect the surface you'll be working on)
  • Eyeshadow glitter 
  • A flat Nail file/plastic spoon or ice cream spatula
  • A cotton ball/dry piece of cloth
Asides from the sandals, this DIY Project cost me 300 Naira only. I purchased the glitter for 200 Naira and a pack of cotton wool for 100 Naira. I had all the other items I used.

Step 1

DIY GLITTER SANDALS

Place your cardboard sheet on your work surface. Wipe the surface to be coated with a clean with a dry cloth or cotton wool.

Step 2

DIY GLITTER SANDALS

Apply a coat of clear nail polish to the part you wish to apply glitter. I suggest you do this a segment at a time because nail polish dries very fast.


Step 3


DIY GLITTER SANDALS

Using the nail file, scoop some glitter and pour it over the part you already applied the nail polish. Wait for about a minute for the glitter to dry so that the fallouts are less.


Step 4

DIY GLITTER SANDALS

Apply another coat of nail polish over the glitter. It's totally okay for some of the glitters to rub off as you do this, you can always pour more glitter.

Step 5

DIY GLITTER SANDALS

Pour another layer of glitter over the second coat of nail polish and wait for it to dry completely.


Step 6

DIY GLITTER SANDALS


Rock 'em sandals!

GOOD TO NOTE

DIY GLITTER SANDALS

If you ever get tired of the glitter and want your old sandals back, just use nail polish remover and a cotton ball and everything goes off.

P.S. I tried this out some months back and it worked perfectly for me but I also did not take pictures of the process which is why I made this. The reason why some parts are covered in glitter for step one is that this for me was a retouch for parts of the sandals that the glitter had worn off.


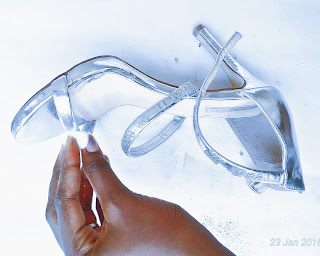
Is this something you'll be willing to try?

Do let me know if you enjoyed this DIY by leaving a comment.

Don't be a stranger.


Share:

Tuesday 16 January 2018

HOW TO MAKE A FAUX BUN ON SHORT 4C HAIR

How to make a big faux bun on Naturalistas


Faux buns are a great way to switch up your hairstyle while keeping your hair ends tucked away. Having a teeny weeny afro can get tiring especially if you run out of ideas on how to style your which is why I experimented with this and was glad it turned out well.
To achieve this style, I put my hair in 2 chunky braids about 2 days earlier to stretch my hair.

how to make a faux big bun for naturalistas

MATERIALS/PRODUCTS USED

how to make a faux big bun for naturalistas

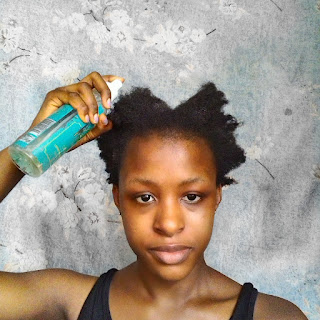
KUICARE Hair Mist 
- Hairbrush(not pictured)
- Eco styler gel
- 4 Elastic bands(not pictured)
- Afro by nature Leave-in conditioner
- Afro or kinky textured hair extensions (in this case, Noble Kinky Bulk)
- Bobby pins(optional)
- A Scarf (not pictured)

SUBSTITUTES ARE;

- Water or leave in conditioner
-  An old toothbrush
-  Any gel of your choice
- Any hair extension that has a similar texture to your hair
-  A neatly folded or piece of cloth that can go over your head

STEP 1

how to make a faux big bun for naturalistas

Moisturise your hair and finger detangle. I used a hair mist then followed with a leave-in conditioner.

STEP 2

how to make a faux big bun for naturalistas

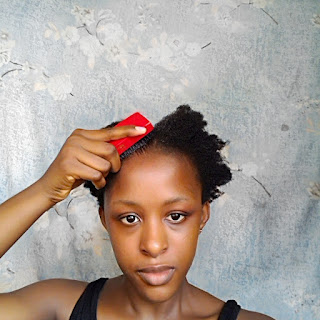
Divide your hair into 2 parts (left and right)  using your fingers then using your hairbrush, brush your hair well to smoothen it.
P.S. I used my fingers so that the partition would not be perfect and look less conspicuous.

STEP 3

how to make a faux big bun forNaturalistas

Apply the gel to the 2 partitions made earlier using your finger tips and brush it out properly with the hair brush.

STEP 4

how to make a faux bun on Naturalistas

Using 1 elastic band put each hair partition into a puff (don't worry if it looks awkward).

STEP 5

how to make a faux big bun for Naturalistas

Tie your scarf tightly (not too tight) over your hair and be sure you leave out the mini puffs.

STEP 6


Get a section of the kinky extension and attach it to each mini puff using an elastic band.
NOTE  Tah The quantity of extension you attach will determine the size of your faux bun

STEP 7


Twirl the kinky extension then roll it over as if you are trying to make a doughnut hairstyle then tuck it into the elastic band or secure with a bobby pin. Repeat the same for the other side. 


STEP 8

faux big bun for naturalistas

Untie the scarf and rock your Faux Big Bun.

Did you enjoy this hair tutorial?

Is this a style you'll be willing to try out?

Leave your thoughts and questions in the comment box below.


Share:

Friday 5 January 2018

MY 2018 BLOGGING GOALS + A RECAP OF 2017

UA-110740967-2
Happy New Year Guys! I have written a post sharing with you my 2018 Blogging Goals.
First of, I am not good at keeping resolutions which was why I came up with my 2018 blog goals. 2017 was a really good year for me mainly because I started this blog after procastinating for a really long time, I got married too *covers face* , I graduated from the university, and got inducted. I also had an equal share of blessings, disappointments and frustration but on the bright side, I learnt my lessons too. In the past, a new year usually signalled writing a list of My New Year Resolutions which I had to give to my parents. Honestly, I never kept to them and I still can't figure out why. This time around I have goals which I further categorised into family goals and blogging goals and guess what? I will be sharing my 2018 blogging goals with you, yes YOU!

MY 2018 BLOG GOALS FOR CHIKA'S ALCOVE THE AMATEUR BLOGGER

1. CONSISTENCY

Consistency is key which is why this year I'll put more effort in creating new content and sharing at least once a week. It may be more but I am not making any promises.

2. RESEARCH AND READ

Being new at blogging, alot of things seem abstract to me. So this year I will learn new things by researching, reading books, blogs, you name it to up my blogging game.

3. 2K PAGE VIEWS ANYONE?

I am clueless as to how to achieve this but that's what my 2 goal is for. I look forward to connecting to more readers and bloggers as well by creating, creating and creating.

4. COLLABORATIONS

I plan to have a collaboration with a brand this year. May be a fellow blogger or a natural hair care brand but expect something. So help me God. Do you have goals you'd like to achieve before the year runs out? Please share them with me in the comment section
Share:
© CHIKA NNADI | All rights reserved.
Blog Layout Created by pipdig