If you grew up in a typical Nigerian home, you have experienced the different ways empty tin cans aka kom kom has been repurposed. Some examples are; as a measuring cup, soap dish, peg holder, as a container for steaming okpa.
One of my favourite memories of using or repurposing old tin cans is eating okpa di oku from it. I can assure you that Okpa di oku is sweetest when eaten from a tin can aka kom kom *with thick Igbo accent*.
One of my favourite memories of using or repurposing old tin cans is eating okpa di oku from it. I can assure you that Okpa di oku is sweetest when eaten from a tin can aka kom kom *with thick Igbo accent*.
For my non-igbo readers, okpa di oku is a pudding made from bambara nut flour usually eaten in the south eastern parts of Nigeria.
I decided to try adding a nice twist to the one of the various methods of repurposing a Tin can.
I'll be showing you how to repurpose empty tin cans into an organizer for things like makeup brushes, stationaries, combs, etc.
I already had all the materials around except for the Top Bond glue which I got from a stationary store for 100 naira.
I already had all the materials around except for the Top Bond glue which I got from a stationary store for 100 naira.
- a 6×4" fabric of your choice,
- an empty Tin can,
- Top bond glue (any waterproof glue),
- Scissors,
- Pen or Tailor's chalk,
- Measuring tape,
- small cloth or 1 piece of wipes and
- Applicator for the glue.
- A Lighter
-Trimmings or accessories of choice
- A Lighter
-Trimmings or accessories of choice
THE PROCESS
Use the piece of cloth or wipe to clean the tin can clean to remove dust.
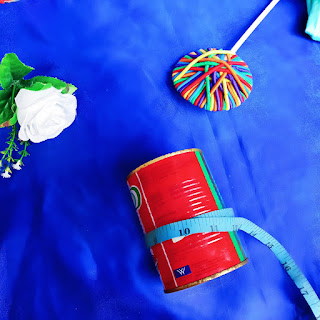
Using your measuring tape, measure the length and width of the tin can and take note of the numbers.
Step 3
Use the numbers gotten from the step just before this and measure out a quantity of fabric matching it.
P.S. Add about 1" to the length for the width taken for the overlap.
P.S. Add about 1" to the length for the width taken for the overlap.
Using an applicator or brush, gently apply a slightly thick layer of the glue all over the surface of the tin can.
Carefully wrap your already cut fabric over the tin can and ensure it covers it well. Apply some glue underneath the excess fabric and make overlap. Leave it to dry for about 5 minutes.
Use a Lighter to slightly burn the edges of the fabric to avoid fraying.
Step 7
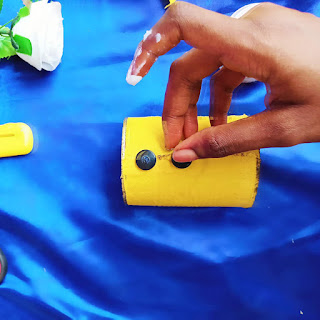
Attach trimmings or accessories of your choice and let it dry completely. I used a bow and some buttons.
Step 8
Enjoy storing your stuff in your bougee organizer.
Step 7
Step 8
Enjoy storing your stuff in your bougee organizer.
I hope you enjoyed this DIY tutorial.
I have a video on my instagram page showing you how I achieved this.
Kindly leave your thoughts, comments and DIYs you'd like me to try out in the comments section.
I have a video on my instagram page showing you how I achieved this.
Kindly leave your thoughts, comments and DIYs you'd like me to try out in the comments section.
Till next time,
Chika.


No comments
Post a Comment
Leave a comment